During the course of filming we realised that we could most likely get some good looking tracking shots for use in our New Wave films so we decided to film from a car window whilst it was moving around various locations, although this presented a problem as we would need to first alter the cameras shutter speed before filming otherwise the footage would be too out of focus due to motion blur, so the first thing that was needed was to alter the cameras settings.
This footage shows a tracking shot from a moving car with the shutter speed set at 1/100s which is too slow as while the car is moving everything becomes distorted and blurred, the aperture was set at f/22 while the ISO was set at 1200 so everything was in focus, and the shutter speed was set at a speed that would allow an appropriate amount of light into the camera, however this caused the camera to capture the car movement at a slower rate causing this motion blur to occur.
This footage however shows the movement from the car more clearly, this is due to the cameras shutter speed being changed to a quicker rate of about 1/500s which captured the movement more clearly, also the other settings had not been altered so the ISO was still at about 1200, and the aperture at f/22 so everything was captured in focus and enough light was able to be absorbed by the camera to provide a bright look o the footage.
This footage could also be seen as new wave since it is using innovative camera movements to establish a tracking shot, using a cheap inexpensive and moderately effective method that requires almost no budget and it does show the local area where most of our footage takes place.
Showing posts with label Camera Tech. Show all posts
Showing posts with label Camera Tech. Show all posts
Tuesday, 20 November 2012
Camera Tech: Shutter Speed
Shutter speed is the speed in which the lens gate on a camera opens and closes during a shot or whilst filming, on DSLR cameras this speed can be manually adjusted to create different effects. Shutter speed effects the amount of time the camera sensor is exposed to light and can also affect how movement appears in the image. For example a slow shutter speed would mean the camera lens gate is left open for longer periods of time, exposing the cameras light sensor for longer and capturing movement at a slower rate, whereas a fast shutter speed would rapidly open and close the cameras lens gate, limiting the amount of time the sensors are exposed to light and capturing quick movement instantly.
Shutter speed is measured in direct relation to the cameras Aperture settings at a 2:1 scale e.g. an aperture of f/2.8 is equal to a shutter speed of 1/1000s so the wider the aperture the faster the shutter speed this is to ensure that the camera is exposed to the correct amount of light to produce the image and is not overexposed, the highest shutter speed for a typical DSLR camera today is roughly 1/1600s with the lowest being 1/10s. Below is an example of how shutter speed can effect an image.

Shutter speed is measured in direct relation to the cameras Aperture settings at a 2:1 scale e.g. an aperture of f/2.8 is equal to a shutter speed of 1/1000s so the wider the aperture the faster the shutter speed this is to ensure that the camera is exposed to the correct amount of light to produce the image and is not overexposed, the highest shutter speed for a typical DSLR camera today is roughly 1/1600s with the lowest being 1/10s. Below is an example of how shutter speed can effect an image.

The first image is taken with a very high shutter speed to quickly capture the movement of the object and the far right image is taken with a slow shutter speed which is exposed longer and thus captures more of the objects movement which blends it together and creates a blur of motion.
While being used in tandem with other settings such as Aperture if the aperture is set on a low setting and the aperture is very wide then a quicker shutter speed would be required otherwise it would be too overexposed to light, this is also true if a high ISO is being used as the cameras sensor would be more sensitive to light so a faster shutter speed would ensure that the camera is not exposed for too long, if the aperture was a very high setting and it was a very narrow depth of field with a low ISO a slower shutter speed would be used otherwise the image would be underexposed and would appear very dark.
Camera Tech: I.S.O
ISO is the measure of how sensitive the camera becomes to incoming light and effects how exposed the image or film is light. An example would be using a high ISO is areas with limited light sources or whilst filming at night and a low ISO for areas that are well lit such as a high volume of natural light, however a high ISO also increases the amount of image noise which distorts the image by giving it a very grainy, static appearance, so a low ISO is often the best option, especially when used with either a low shutter speed or wide aperture as using a high ISO in this circumstance would overexpose the image.
Most digital DSLR cameras have the option to alter the ISO manually depending on the situation you are shooting in and generally have ISO values that range from 100 to 3200, 100 ISO in the right light conditions would give a very crisp clear shot whereas an ISO of 3200 would dramatically increase the film grain on the image. Below is an example of how ISO affects an image.

The image on the left uses an ISO of 100 so the shot is very crisp and clear whereas the image on the right is shot using an ISO of 3200 which has increased the amount of grain on the image, distorting it slightly. Generally a low ISO would be used for high density light conditions however it can also be used in tandem with a wide aperture or a low shutter speed to limit the amount of film grain on the image while still being brightly lit as the wide aperture would allow more light into the camera so a low ISO making the light sensor less sensitive would be appropriate.
Camera Tech: White Balance
White balance is how the camera adjusts the intensity of primary colours, to correct the colour scale in an image by keeping neutral colours neutral. This means that by adjusting white balance it ensures that objects which appear white in reality are rendered as white in the image and removes colour casts that may occur that would give the image a blue,orange or green tint to it. The adjustment of white balance on a camera means it has to discern the "colour temperature" of a light source which refers to relative "coolness" or "warmth" of neutral white light which can improve the image taken on a camera under different light conditions.
The following table is a guide on the correlated colour temperature of common light sources.
White balance from Lewis Mercer on Vimeo.
The first piece of footage shows how the white balance as it was by default which in the lighting conditions of the location we were in cast an orange tinted glow over the images which was not how the colours appeared in reality, the second piece of footage shows the effects of the white balance being changed to suit the lighting conditions which made the images appear much clearer, the whites in the images also appear as they appear in reality which makes the footage look brighter by comparison.
The following table is a guide on the correlated colour temperature of common light sources.
| Color Temperature | Light Source |
| 1000-2000 K | Candlelight |
| 2500-3500 K | Tungsten Bulb (household variety) |
| 3000-4000 K | Sunrise/Sunset (clear sky) |
| 4000-5000 K | Fluorescent Lamps |
| 5000-5500 K | Electronic Flash |
| 5000-6500 K | Daylight with Clear Sky (sun overhead) |
| 6500-8000 K | Moderately Overcast Sky |
| 9000-10000 K | Shade or Heavily Overcast Sky |
The following footage shows how the white balance needs to be adjusted in certain light conditions in order to render colours correctly within the image as they would appear in reality.
White balance from Lewis Mercer on Vimeo.
The first piece of footage shows how the white balance as it was by default which in the lighting conditions of the location we were in cast an orange tinted glow over the images which was not how the colours appeared in reality, the second piece of footage shows the effects of the white balance being changed to suit the lighting conditions which made the images appear much clearer, the whites in the images also appear as they appear in reality which makes the footage look brighter by comparison.
Innovative Camera Movements
One aspect of New Wave films that made them separate from mainstream cinema during their time was with the use of innovative and creative camera angles and movements using anything they could to move the camera in different ways, such as in Godard's "Breathless" where the camera is placed on the top of an escalator to film the woman as she ascends. The use of innovative camera movements can alter the way in which an audience views a film.
Spinning Shot test 1 from Lewis Mercer on Vimeo.
For this shot we tried to use a local parks "merry go round" as a way of making the camera spin whilst a subject was in the foreground, giving the appearance that the background was moving while the subject remained motionless. We used a setting of Aperture of f/22 to make the subject in the foreground in sharp focus however the background became blurry and out of focus which would be due to the spinning of the camera, we also used an ISO of between 600-800 so that the footage would be brighter as on the day we filmed this it was very dark and overcast.
escalator footage from Lewis Mercer on Vimeo.
This footage was done to try and imitate the scene from Godards "Breathless" where a woman ascends on an escalator and the camera is placed in front of her during the ride upward as if the camera is moving with her as an innovative and cheap alternative to a tracking shot, also we tried to shoot the footage in black and white to further imitate the scene from Godards film. This footage was done to be New Wave as it was using a single camera being handheld in a public area, and also we have no budget to film with so innovative use of the camera is needed.
This is a few examples of how we have tried to use innovative camera movement within our process of filming.
Spinning Shot test 1 from Lewis Mercer on Vimeo.
For this shot we tried to use a local parks "merry go round" as a way of making the camera spin whilst a subject was in the foreground, giving the appearance that the background was moving while the subject remained motionless. We used a setting of Aperture of f/22 to make the subject in the foreground in sharp focus however the background became blurry and out of focus which would be due to the spinning of the camera, we also used an ISO of between 600-800 so that the footage would be brighter as on the day we filmed this it was very dark and overcast.
escalator footage from Lewis Mercer on Vimeo.
This footage was done to try and imitate the scene from Godards "Breathless" where a woman ascends on an escalator and the camera is placed in front of her during the ride upward as if the camera is moving with her as an innovative and cheap alternative to a tracking shot, also we tried to shoot the footage in black and white to further imitate the scene from Godards film. This footage was done to be New Wave as it was using a single camera being handheld in a public area, and also we have no budget to film with so innovative use of the camera is needed.
Filming in Coloured Environments
During filming there is something that needs to be considered, something that can define a shot and make it stand out and that is the kinds of colours used. Colour can provide subjective meanings and can have multiple connotations of different things within a shot, e.g. red meaning danger or white meaning innocence etc. Colour within a shot can help set the mood and atmosphere of a scene such as bright colours being used to suggest an upbeat positive feel, and this can provoke reactions from audiences.
We tried to film in various different coloured environments to see how colours may change depending on the type of background they are in and what effects they may have. This is a short montage of a few locations that use bright colours in the background or to purposely draw people towards them, such as advertisements or sweets.
Color footage from Lewis Mercer on Vimeo.
The coloured buildings on the street seem to give the area a sense of variety and it makes them all look quite inviting, as while they seem like old styled buildings due to the bright colours they are not too imposing. While the brightly packaged sweets and chocolates seem to try and draw you towards them as an incentive to buy them which shows how colours can affect what people may buy, this is also the case with the small cafe as with it being coloured very brightly it looks like it would have a rather positive atmosphere inside, inviting people in.
OH&S: Occupational Health and Safety
As this was a new area we were filming in there would need to be some precautions as to how we were going to film and where as the area was unfamiliar to us we would need to take extra care when travelling to a location. In this instance it was a rather busy street so we would need to be careful not to get in peoples way or have any of the equipment damaged. some of the risks involved included:
- Risk of falling and causing injury to ourselves/other crew members/ members of the public
- Risk of dropping and/or damaging equipment
- Risk of being mugged/robbed
- Risk of accidentally hitting members of the public with equipment whilst travelling/setting up
- Risk of being hit by traffic
- Risk of getting lost
- Hazards such as objects in the path e.g. broken glass
- Travel in groups between locations
- Do not leave equipment unattended, always have one member watching the equipment at all times
- Share the load of equipment to avoid risk of one person being over encumbered and dropping the equipment
- Ensure that when filming either the camera is set up in an open clearly visible manner that will be easily avoidable by members of the public or the camera is set up in a position that is out of the way and will cause minimal disruption to members of the public
- Ensure that whilst filming all crew members stay clear of the road and traffic to avoid getting hit and injuring themselves
- Ensure that all equipment is safely packed away once filming has been completed and while travelling to different locations
Monday, 15 October 2012
3rd Outing: Tracking Shots
On the 3rd time we went out filming we realised we needed tracking shots that could capture some of the conventions of new wave, so we decided to choose a location that could capture the essence of a social issue affecting the local area such as unemployment. We decided to capture some static tracking shots initially just to determine if the way we were shooting the footage and the location would work out the way we hoped. The footage is new wave in the fact it is filmed in a location that reflects a social issue and we were using only one camera, as we have no budget similar to French New Wave films that are filmed with little or no budget at all.
static tracking shots from Lewis Mercer on Vimeo.
The footage is comprised of shots from two different viewpoints and angles, and I edited it together to give it the appearance of a quick cut, a technique often used in New Wave films, the footage is also shot in high contrast monochrome, another convention of French New Wave, also because the footage was shot in a local area with real peoples reactions to the camera being captured. the footage shows a subject walking through an area that has many rundown shops that have gone out of business to highlight the possible social issue of unemployment in the area.
OH&S: Occupational Health and Safety
During this outing we would be out in public filming shots for our New Wave project and there would be a various amount of safety concerns that we would need to address before we commenced filming as we would be carrying expensive filming equipment and would be in a high traffic area with a large amount of people in the vicinity so we would need to be aware of the various hazard that could occur during the shoot.
- High volume of traffic that could prove dangerous
- Be aware of the locations reputation e.g. is it known to have high crime rates
- Risk of injury due to falling/dropping equipment/being knocked by passers by/ being hit by traffic/misconduct
- Risk of being hit by traffic as it was a busy area built up area
- Risk of being mugged/robbed
- Risk of dropping/damaging equipment
- Risk of injuring other people through dropping equipment/misconduct
- Always travelling in groups to avoid being mugged/robbed in public
- Share the equipment equally so no one person is over encumbered and risks dropping the equipment and damaging it
- Take caution whilst travelling directly next to the road to avoid falling and being hit by oncoming traffic
- Ensure that the camera and equipment is never left unattended
- Ensure that whilst filming no passers by accidentally knock over or damage any equipment
- Ensure that whilst filming you are in a relatively open area and easily visible to avoid getting in the way of other people trying to get past
- If and wherever possible film from a location that is out of the way and will cause the least disruption to other people around you
- Ensure that all equipment is secured in a safe manner before commencing filming and packed away whilst travelling to a new posit or location
Wednesday, 10 October 2012
2nd Outing: Camera Movements
During the time that we were filming on location for the second time, we decided to take some shots from an escalator to try and get some interesting camera movements, we had a subject go up and down on as set of escalators and had the camera placed either in front of or behind them, to capture the movement of the subject whilst remaining in focus, and to create a simple, interesting tracking shot.
escalator footage from Lewis Mercer on Vimeo.
This technique is considered a New Wave camera movement because it is using innovative use of the environment to create a tracking shot of the subject in an interesting way, and also because this technique requires no other special equipment and simply uses modes of transport already present in the environment to its advantage.
This footage is similar to a scene in Jean-Luc Godard's film "Breathless" where the camera is placed on an escalator facing a woman who is travelling up them which then turns to a tracking shot, so we were trying to recreate that in our footage by using a new wave technique.

OH&S: Occupational Health and Safety
During the filming of this scene and while practicing this technique there were a few health and safety concerns that needed to be addressed as both the subject and the person operating the camera would be on a moving platform, and there would be other people around them as they were in a public area. These hazards include:
- Both the subject and camera operator would be on a moving surface and could slip/fall and/or injure others nearby
- They would be holding expensive equipment and would be at risk of damaging it
- Risk of falling on the escalator
- Risk of injuring themselves and/or others
- Behaving appropriately whilst on the escalators
- Ensure that the subject and camera operator are standing firmly on the escalator
- Ensure that either the subject or camera operator has one hand on the railing for support to avoid loss of balance whilst either ascending or descending
- Ensure that no other people are in very close proximity to the subject/ camera operator whilst filming.
- Consider that other people will be around during filming and that crew members should stay a safe distance from them whilst on the escalators.
Tuesday, 2 October 2012
Camera Testing 1st Outing: Camera Movements
Summary
For our first time out filming once we were adjusted to operating the cameras we decided to get creative with certain camera movements, so using objects and structures we had available at the time in our location seemed a good idea. We placed the camera on a tripod and then placed it on a small merry go round and we placed a subject in front of the camera and had it spun around, this proved to create a very interesting way of how the camera moved as while the background was moving and out of focus the subject remained clear and in focus, this generated an interesting effect that we should consider utilising again.
Spinning Shot test 1 from Lewis Mercer on Vimeo.
New Wave
We tried to perform a series of innovative camera movements during this test to relate it in some way to the techniques of New Wave films, we did this as an attempt to imitate the camera movements or at least create a similar effect as the waltzer scene in Jean Luc Godards " the 400 Blows". We attempted to create a similar effect to that scene by using what was available at the time such as the parks merry go round to create the spinning effect, the use of such innovative methods of camera movements is a New Wave technique of filmmaking as it uses objects in the environment or whatever is available to move the camera in interesting ways without the use of expensive equipment such as a rage to move the camera.
3rd Outing: Test Footage - Depth of Field
Summary
One of the techniques we experimented with whilst filming was the use of depth of field and focus to add interesting effects to the footage, we were shooting with Canon 5D cameras at an aperture of F/5 a wide aperture that would have sharp focus on objects near the camera lens and shallow focus on objects further away. So we decided to experiment with this aperture to try and create some interesting shots such as with tracking shots, establishing shots and static shots of a subject.
Depth of Field test from Lewis Mercer on Vimeo.
For this shot we used a wide aperture of f/2.6 on a static tripod so that the background to the shot was out of focus and blurred, so that when the subject approached the camera they would gradually come into focus, as well as an ISO of at least 800 and white balance of 8000k since also whilst filming this we were working in overcast weather conditions. This footage can be seen as new wave as it is using an innovative use of camera to track a subject and uses an inventive use of camera settings and depth of field to track the subject.
3rd Outing: Test Footage - Cutaways
Summary
Another technique we decided to try whilst filming was the use of cutaways on a subject to create a wider variety of interesting shots that would divert the audiences attention from the main subject. We decided to shoot some cutaways to try and show influence to New Wave filming techniques as sometimes the film would suddenly jump cut to something else during a sequence wether it was related to the previous shot or not.
Cutaway Test from Lewis Mercer on Vimeo.
For this footage we intended to use an apertures of f/2.6 with an ISO of 800 to ensure that enough light entered the camera as when we filmed this it was a very overcast day so there was not a great deal of light we also needed to alter the white balance to at least 8000k due to the over cats conditions during filming. This footage is new wave because we intended to use cutaways and jump cuts in our footage similar to films such as "Breathless" which uses a vast amount of cutaways and jump cuts.
Monday, 1 October 2012
3rd Outing: Evaluation
After this third session of filming, We have found that each time we learn a new technique or use a new piece of equipment, it opens up a wide range of new possibilities for us whilst we're filming. In this case it is the use of the reflector and different uses for depth of field, also we attempted to try to add the use of cutaways into some of the shots, which we found made our shots look more interesting, as experimenting with different things allowed us to be more creative and improve how we filmed each shot. The light reflector was a new piece of equipment for us so were unsure how to properly utilise it until after a few practice shots, and while experimenting with depth of field it also took a while for us to get used to it, as we needed to manually adjust the focus during shots where either the subject or camera were moving. Overall however we managed to obtain some interesting footage that uses new techniques which we had never attempted before and some shots which were greatly improved by using a new piece of equipment.
Light Reflector/Depth of Field testing
Light Reflector Practice
These shots are examples of how we used the light reflector whilst shooting, and it shows how we needed to adjust the reflector in different ways in order to try and use it properly. we needed to use the reflector in a way so that it wasn't in the shot whilst filming and for that we needed a few practice shoots and we also need to determine how it would move with the camera if we were to do tracking shots, although overall the results seemed appropriate.


Light Reflector/Depth of Field testing
 |
| Light Reflector Shot |
 |
| Depth of Field Shot 1 |
 |
| Depth of Field Shot 2 |
 |
| Depth of Field Shot 3 |
These shots show the effects of our experimentations with the depth of field and the light reflector, the depth of field shots were done by using placing the camera on a tripod with a wide aperture so only the foreground would be in focus, then the subject would be in the background out of focus and would gradually move towards the camera and slowly come into full focus while the background remained in shallow focus. The light reflector shot demonstrates that we learned how it can improve the lighting on a subject even if there is little or no light source which could help us improve if we are to use high contrast lighting in our final edit.
Light Reflector Practice
These shots are examples of how we used the light reflector whilst shooting, and it shows how we needed to adjust the reflector in different ways in order to try and use it properly. we needed to use the reflector in a way so that it wasn't in the shot whilst filming and for that we needed a few practice shoots and we also need to determine how it would move with the camera if we were to do tracking shots, although overall the results seemed appropriate.


Tuesday, 25 September 2012
2nd Outing: Evaluation
Summary
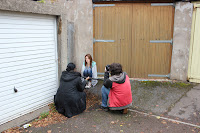
On the 24th September we decided to go out and shoot some more test footage for our New Wave project, we decided that we needed some establishing shots of the townscape and some tracking shots perhaps shot from the inside of a car, so we decided to separate into two groups in order to get as much footage done as possible. What came from the venture was a few interesting tracking shots and a variety of different angled establishing shots, the establishing shots were taken from the roof of a local multi-story car park which was the highest vantage point available which allowed for a variety of wide angle establishing shots and high angle shots. The tracking shots also proved to produce interesting footage, such as a long shot that shows influence from "The 400 Blows", as well as some varying shots from different views, side tracking shots and shots taken at the front of the car also seemed to have been successful, however a few of the shots have problem with camera shake and focus.
Camera Testing Photos


Wednesday, 19 September 2012
Camera Tech: Aperture
Aperture-definition
Aperture-Measurements
Aperture is measured in a ratio of focal length to effective aperture diameter, a lens usually has a set of f-stops which measures the diameter of the aperture. A higher f-stop number will usually mean a lower aperture diameter so the depth of field will be further, whereas a lower f-stop number will mean a larger aperture diameter and decrease the depth of field. The greater the f-stop number the lesser the light is exposed to the camera and vice versa.
 |
| Aperture Scale Diagram |
Tuesday, 18 September 2012
Camera Testing 1st Outing: White Balance
White Balance
Another problem we faced whilst filming was the matter of the one of the cameras White Balance setting, which whilst filming gave all of the footage a light blue tint. At first the problem seemed to occur from just the setting being wrong however the camera was set on the correct White Balance setting for the weather and light conditions we were in which meant that the actual problem was with the cameras software instead, meaning that the camera was set at the right white balance setting but couldn't read it correctly, something which we had no knowledge of until after filming so it was something we couldn't change during the time.


Another problem we faced whilst filming was the matter of the one of the cameras White Balance setting, which whilst filming gave all of the footage a light blue tint. At first the problem seemed to occur from just the setting being wrong however the camera was set on the correct White Balance setting for the weather and light conditions we were in which meant that the actual problem was with the cameras software instead, meaning that the camera was set at the right white balance setting but couldn't read it correctly, something which we had no knowledge of until after filming so it was something we couldn't change during the time.


These shots show how although the correct white balance setting was used the cameras internal reader couldn't accept it so the shots came out with a pale blue tint throughout the filming. This problem only occurred on one camera however so only a small amount of footage was affected by it although it demonstrates how using the wrong setting can alter how the image will appear. For future tests this will need to be avoided so the consideration of checking the cameras settings beforehand would seem appropriate, in order to ensure that the cameras white balance settings aren't incorrect again.
Camera Testing 1st Outing: Focus/Depth of Field
Depth of Field
During our first outing to test camera techniques we encountered a variety of problems with both the environment and the equipment. One such problem that occur frequently was the focus and depth of field on our camera was not at the right setting making our footage look either blurry or the depth of field was wrong. For instance whilst attempting to perform a reverse dolly shot while the camera was moving backwards and zooming in, since the camera was set to Manual Focus it was difficult to adjust the cameras depth of field while at the same time reversing it away from the subject, this made some of the footage come out blurred and out of focus.
These images are screenshots from footage taken during the reverse dolly shot which show the problem we had with changing the depth of field as the camera was moving. The shot became blurred and out of focus which ruined the shot as the camera was moving.
During our first outing to test camera techniques we encountered a variety of problems with both the environment and the equipment. One such problem that occur frequently was the focus and depth of field on our camera was not at the right setting making our footage look either blurry or the depth of field was wrong. For instance whilst attempting to perform a reverse dolly shot while the camera was moving backwards and zooming in, since the camera was set to Manual Focus it was difficult to adjust the cameras depth of field while at the same time reversing it away from the subject, this made some of the footage come out blurred and out of focus.
 |
| Depth of Field Problem no.1 |
These images are screenshots from footage taken during the reverse dolly shot which show the problem we had with changing the depth of field as the camera was moving. The shot became blurred and out of focus which ruined the shot as the camera was moving.
 |
| Depth of Field Problem no.2
These shots show the problems with using a camera where the depth of field and focus has to be manually changed whilst the camera is moving, it became a problem as while one person was moving the camera the one needed to adjust the focus. I think that to fix this problem in future consideration for perhaps using either a different camera which has no adjustable focus or perhaps a different method of filming and planning such as marking out start/end points for where the camera will move and exactly how much the cameras focus will need to be tuned by the time the camera reaches the end point e.g. tuning the cameras focus from 35mm to 55mm within a stretch of 2 metres whilst reversing on a dolly.
One advantage of using the 600D camera that we used however is that the focus can be altered manually as on other cameras it either does it automatically or you cannot alter it at all so being able to change the focus manually can be useful even if it does cause problems as it needs to be finely tuned if the camera is moving. For a future test the use of a different camera could make a difference to how well the focus is affected whilst filming.
|
Subscribe to:
Posts (Atom)