Low Key lighting is used and is most effective when only a single light source is present within a shot be it either overhead, eye level or at a low angle, it can create different effects on the subject. One of its main aspects is that the light casts a great deal of shadow across the subject, which can generate different connotations of the subject, such as the light source being on one side of them at eye level, casting half of their features in shadow would make them appear mysterious or intimidating. Low key lighting is often used in Noir films but also in New Wave films because as it only uses one light source it is a cost effective way of lighting a scene and effects such as Rembrandt or Edge lighting can be applied using only one small light source.
The pieces of footage below are examples of our use of low key lighting.
Continuity 2 from Lewis Mercer on Vimeo.
This footage uses low key light as only a small light source is used to highlight the subject, the light source itself was in fact the light from a mobile phone which only created a small amount of light, a wide aperture of f/2.8 was used with an aperture of at least 800 since we were using a very small light source we didn't want the footage to be underexposed, this footage falls into conventions of new wave because it is using a very cheap form of lighting which is inventive as due to the small area we could most likely not accommodate large studio lights.
Edge light ex from Lewis Mercer on Vimeo.
This footage on the other hand uses a large light source but is very limited as we controlled the amount of light using "barn doors" attached to the light so we could decrease or increase the amount of light that hit the subject, This footage was shot using an ISO of 800 and an aperture of at least f/16 as we were using a larger light source so more light would be entering the cameras sensors, this form of lighting known as Edge lighting was used in New Wave films as a cheap way of creating studio like light effects on a budget as it is a technique that requires only one light source which would be appropriate to a filmmaker with little or no budget.
Showing posts with label Light Tech. Show all posts
Showing posts with label Light Tech. Show all posts
Tuesday, 20 November 2012
Filming in Coloured Environments
During filming there is something that needs to be considered, something that can define a shot and make it stand out and that is the kinds of colours used. Colour can provide subjective meanings and can have multiple connotations of different things within a shot, e.g. red meaning danger or white meaning innocence etc. Colour within a shot can help set the mood and atmosphere of a scene such as bright colours being used to suggest an upbeat positive feel, and this can provoke reactions from audiences.
We tried to film in various different coloured environments to see how colours may change depending on the type of background they are in and what effects they may have. This is a short montage of a few locations that use bright colours in the background or to purposely draw people towards them, such as advertisements or sweets.
Color footage from Lewis Mercer on Vimeo.
The coloured buildings on the street seem to give the area a sense of variety and it makes them all look quite inviting, as while they seem like old styled buildings due to the bright colours they are not too imposing. While the brightly packaged sweets and chocolates seem to try and draw you towards them as an incentive to buy them which shows how colours can affect what people may buy, this is also the case with the small cafe as with it being coloured very brightly it looks like it would have a rather positive atmosphere inside, inviting people in.
OH&S: Occupational Health and Safety
As this was a new area we were filming in there would need to be some precautions as to how we were going to film and where as the area was unfamiliar to us we would need to take extra care when travelling to a location. In this instance it was a rather busy street so we would need to be careful not to get in peoples way or have any of the equipment damaged. some of the risks involved included:
- Risk of falling and causing injury to ourselves/other crew members/ members of the public
- Risk of dropping and/or damaging equipment
- Risk of being mugged/robbed
- Risk of accidentally hitting members of the public with equipment whilst travelling/setting up
- Risk of being hit by traffic
- Risk of getting lost
- Hazards such as objects in the path e.g. broken glass
- Travel in groups between locations
- Do not leave equipment unattended, always have one member watching the equipment at all times
- Share the load of equipment to avoid risk of one person being over encumbered and dropping the equipment
- Ensure that when filming either the camera is set up in an open clearly visible manner that will be easily avoidable by members of the public or the camera is set up in a position that is out of the way and will cause minimal disruption to members of the public
- Ensure that whilst filming all crew members stay clear of the road and traffic to avoid getting hit and injuring themselves
- Ensure that all equipment is safely packed away once filming has been completed and while travelling to different locations
Tuesday, 9 October 2012
Lighting Examples: Edge
The last lighting technique we attempted was the use of Edge lighting which creates a very high contrast between the light and dark areas of a subject, and exaggerates shadows and has very little highlights or illumination to give the subject an almost sinister, mysterious appearance. We tried to create this lighting by using a small source of light to create a hard lighting effect that would only highlight a small part of the subject while the rest would be cast in shadow, our footage shows how the shadows cover more than half of the subjects face and there is only a small glimmer of light from the subjects eye which makes the subject look almost mysterious.
Edge light ex from Lewis Mercer on Vimeo.
This lighting technique is also used in New Wave films, again because its shot in high contrast monochrome, but also because of the effect it has on the subject, by maxing their features in shadow it creates a mysterious effect on the subject, and makes the subject seem darker, almost more cynical which could be seen in certain new wave films such as Jean luc Godards "Breathless" (1960). These lighting techniques are also new wave because they were low budget films so shots that have lighting that only requires one light source would be easier to film on a small budget.
 This is a screenshot from Godards film "Breathless" which shows edge lighting in effect on this character to cover his facial features in shadow.
Edge light ex from Lewis Mercer on Vimeo.

Lighting Examples: Butterfly
Another lighting technique we were to put into practice is "Butterfly" lighting which was often used in Hollywood films of the 50's, its used to flatter the subject and make them more attractive so it would most likely have been used on female subjects. We tried to practice this by also using a female subject and our footage shows how it affects the subjects facial features as it adds shadow under the subjects cheek bones and over their eyes which illuminates the subjects face making it more striking.
Butterfly Light ex from Lewis Mercer on Vimeo.
This footage is also new wave in the fact that it is shot in high contrast monochrome that would be present in many French new wave films of the 1950-60's. The lighting highlight the subjects features in a way that makes them more attractive, which is often present in French new wave films as if there was a female actress as the subject the lighting technique would generally be used to make them look attractive. It is also used because butterfly lighting only requires a main light source which is useful for new wave films since it can be done on a small budget. A vague example of butterfly lighting would be in Jean-Luc Godard's film "Breathless" whenever the female character is on screen.

Monday, 8 October 2012
Lighting Examples: Rembrandt
This is our footage of when we attempted to produce the Rembrandt lighting technique, we tried to adjust the brightness of the key light and the position of the reflector to try and discern what effects it had on the images appearance, as well as how effectively we could produce this lighting technique. The way you can determine that this technique is Rembrandt lighting is that half of the subjects face is un-illuminated but has a small triangular piece of light under the subjects eye to highlight their features a small amount.
Rembrandt light ex from Lewis Mercer on Vimeo.
This footage contains elements of new wave as it is shot in high contrast monochrome, much like the films of the French new wave, the lighting used creates a stark contrast between highlights and shadow on the subject, which this technique is often used in French new wave films due to it also only requiring one light source so it is ideal for a small budget. This technique can be seen, if not vaguely in Francois Trauffants film "the 400 Blows", the subjects face is only half illuminated with a small triangle of light on the un-illuminated side.

Thursday, 4 October 2012
Lighting Evaluation
Summary
Through all of the problems that we had to deal with during the process of our lighting session overall we managed to perform the three different lighting techniques:Rembrandt,Edge and Butterfly lighting, and to an extent they went rather well, we managed to pull off these new techniques in order to use them later on in actual film shoots which would improve our footage greatly, especially if we are shooting a new wave film a it requires high contrast lighting such as Rembrandt or Edge. These new techniques we have practiced are going to help us better light our film scenes to improve the overall quality of them.


Through all of the problems that we had to deal with during the process of our lighting session overall we managed to perform the three different lighting techniques:Rembrandt,Edge and Butterfly lighting, and to an extent they went rather well, we managed to pull off these new techniques in order to use them later on in actual film shoots which would improve our footage greatly, especially if we are shooting a new wave film a it requires high contrast lighting such as Rembrandt or Edge. These new techniques we have practiced are going to help us better light our film scenes to improve the overall quality of them.


Lighting Problems
Problems and Technical Faults
During the time we were practicing our development on lighting techniques we came across many problems in the process. To begin with whilst trying to set up the backdrop we had trouble unravelling it, due to its sheer size we had trouble lifting it, and in the end it unravelled on its own onto the floor so we decided to use a large white piece of cloth instead. Another problem we found was that whilst setting up the key light, we had difficulty getting it to work as for a few minutes we had no idea how to turn it on and afterwards we were unsure how to adjust it to the correct amount of light we needed although it was resolved after a while. However yet another problem occurred, this time with the flash trigger attached to the camera, it wasn't connecting to the umbrella light so the flash was not working, this was a major problem as the regular flash on the camera wasn't half as effective as with the flash trigger on the key light. In the end we had to waste at least 25-30 minutes fixing it so we had to work quicker to get the lighting techniques done because of that technical fault, other problems we found included camera batteries running out and gaps in the studio windows so we needed to spend time filling them in to make the room lightproof so as not to ruin the effectiveness of the key light during the shots.
We had a large array of problems during the lighting techniques session which we needed to backtrack and spend time fixing and adjusting, which became annoying as it caused us to stop shooting on a few occasions and even to relocate to a different area because the key light wasn't working. Although eventually all of the problems did get resolved even if through simple means, and we did get all of the lighting techniques completed in the end, which looked appropriate enough for a first attempt as they were new techniques we were testing out.
Wednesday, 3 October 2012
Lighting Techniques: Edge
The third lighting technique we were introduced to is edge lighting, it uses hard lighting to cast a lot of shadows over a subjects face to obscure it, making the subject seem sinister, it was used all throughout films like "Sin City". Edge lighting requires very little light to highlight a subject and it creates a very stark contrast between light and shade as less than half of the subject is illuminated while the other is cast in shadow.


These two examples show how the lighting casts shadow on a large proportion of the subjects facial features to create contrast between light and shade, with only a small part of the subject being highlighted.
The technical setup for edge lighting is similar in a way to Rembrandt lighting with small changes including less light being used. Firstly the key light must be placed at a 90 degree angle to the subject and it must be at eye level, the camera must face the subject a 0 degree angle while the subject is turned towards the space between the camera and key light at a 30 degree angle, if a fill light is used it must be at a 70-80 degree angle to the subject on the opposite side to the key light.
 |
| Diagram of Edge lighting setup |
Lighting Techniques: Butterfly
Another lighting technique we required practice with is known as Butterfly or Paramount lighting, this type of lighting is used to flatter the subject, by creating shadows above the eyelids and cheekbones, this type of lighting is mainly used in hollywood to make actresses and models look more attractive as it casts more light on the facial features.


The lighting highlights their facial features in clear detail making them stand out, and the shadows under the cheekbones and over the eyelids exaggerates this.
The setup for this style of lighting would require the subject to be facing the camera head on so that all of the face is visible, the key light would need to be behind the camera and at a height of 2-3 ft higher than the subject with it turned at an angle of 70 degrees, there would also be no need for a fill light as the key light would be aimed directly at the subject so a reflector would be impractical.
 |
| Diagram of Butterfly Lighting setup |
Lighting Techniques: Rembrandt
One of the lighting techniques we were going to practice using is Rembrandt lighting, this type of lighting is uses hard lighting to cast half of a subjects facial features in shadow to provide stark contrast between the light and dark, with a small triangle of light under the subjects eye as a highlight on the un-illuminated side of the subjects face. This technique was named after the Dutch painter Rembrandt van Rijn, whose paintings often showed this use of light.
These images show how rembrandt lighting can be used to create contrast between the light and dark areas on a subjects face, and how the small triangle of light highlights the un-illuminated side.
In order to use the rembrandt lighting technique, the setup of the equipment used is important. First of all the camera must be setup to face straight forward, the key light must be placed at a 40-45 degree angle to the subject and the lights height must be 1-2 ft higher than the subjects head, the subject must then be faced at a 30 degree angle towards the space between the camera and the light source, a fill light such as a reflector must also be used and that should be at a 40-45 degree angle on the opposite side of the key light. All of this preparation was required in the initial setup of our equipment before we could start filming, so it was essential that we placed the key light and camera at the correct height and angles.
 |
| A Rembrandt portrait |
 |
| Rembrandt lighting |
These images show how rembrandt lighting can be used to create contrast between the light and dark areas on a subjects face, and how the small triangle of light highlights the un-illuminated side.
In order to use the rembrandt lighting technique, the setup of the equipment used is important. First of all the camera must be setup to face straight forward, the key light must be placed at a 40-45 degree angle to the subject and the lights height must be 1-2 ft higher than the subjects head, the subject must then be faced at a 30 degree angle towards the space between the camera and the light source, a fill light such as a reflector must also be used and that should be at a 40-45 degree angle on the opposite side of the key light. All of this preparation was required in the initial setup of our equipment before we could start filming, so it was essential that we placed the key light and camera at the correct height and angles.
 |
| Diagram of Rembrandt Lighting setup |
Lighting Setup
2nd October 2012
As part of our new wave project, one of the essential things that we had not yet put into practice was efficient lighting techniques, so we decided to set aside a day where we would practice the different lighting techniques that are used in new wave films. First of all was the initial setup of the lighting equipment and the backdrop, we needed to unfurl the backdrop, setup the umbrella light to use as our key light, setup the tripod and camera, the flash trigger and we needed to organise the positions of the camera and light source to coincide with the different lighting techniques. All of this preparation was vital to ensure that when we got down to actually filming these lighting techniques it worked effectively. The initial setup of the lighting equipment was a new kind of task for us as we hadn't used large lighting equipment before, so at first there were a few uncertainties on how to operate them, however as we were only using one key light, we quickly got accustomed to it. After all of the equipment was setup and ready to use we wanted to make a quick start on practicing the different techniques we might need for later shoots.


When setting up the lighting in the studio one of the things we needed to take into consideration was the health and safety concerns of the studio to ensure the safety of our coworkers, we took into consideration the various hazards and dangers we could face whilst working in this confined area.
Potential hazard(s):
All of the potential hazards listed above all have simple solutions that helped prevent any OH&S concern. To begin with whilst setting up the lighting and backdrop we ensured that all wires and equipment was kept out of the way of any area where any person would be walking. The backdrop was unravelled from its frame until the stands to support it were correctly setup and locked into place, the tripod that held the camera was securely locked into place and kept in a specified area whilst shooting and was not moved from that spot. To avoid any issues with the lighting equipment the subject was directed to not look directly at the light whilst we were utilising the flash and all members were kept clear of the lighting equipment during shooting to avoid injury in case it should fall and/or become hot, also whilst shooting the subject was seated on a stool with both feet placed firmly on the ground to avoid injury via falling. Since we were working in an enclosed space each member was instructed to move carefully when needed and to avoid accidental contact with another person to reduce risk of falling and/or unnecessary obstruction whilst shooting. All of the OH&S concerns we noticed during this shoot were all taken care of in order to avoid unnecessary injury during the session.


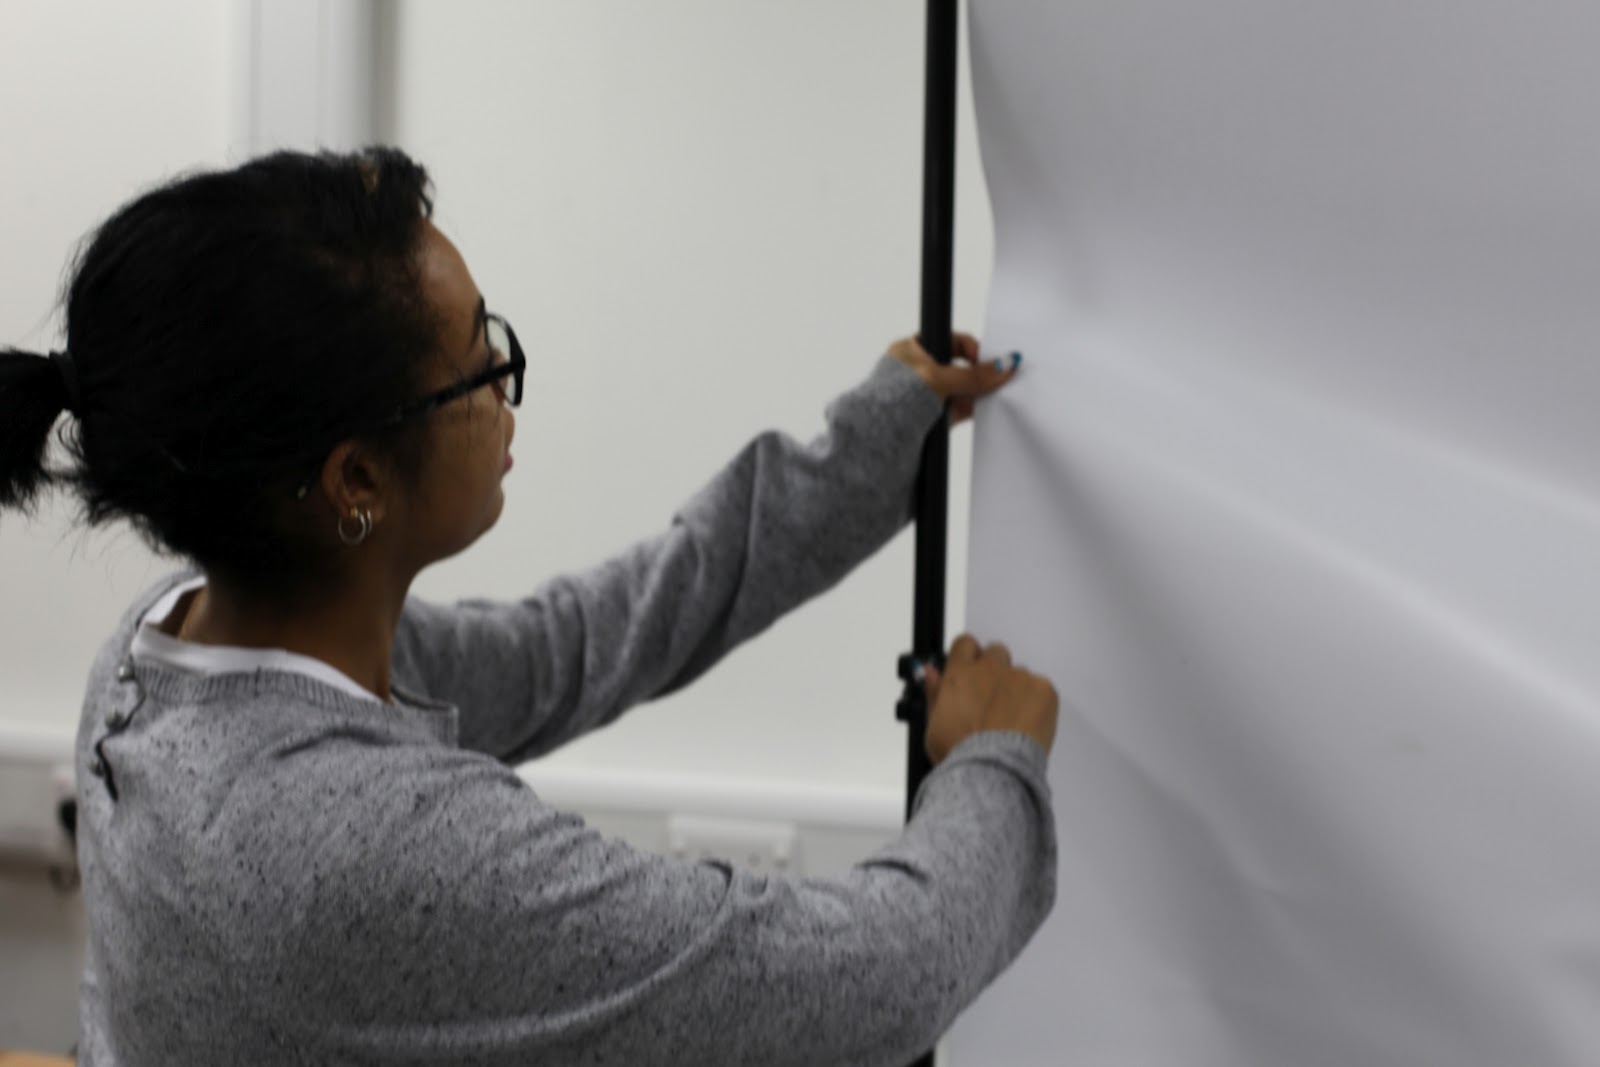


These images show our initial setup of the equipment and as we soon found out fixing a backdrop and operating a light all require more than one person simply due to the size of the equipment being used, as we did experience quite a few problems which we needed to correct before we could actually start shooting, so the setup of the equipment proved an interesting task overall.
OH&S: Occupational Health and Safety
When setting up the lighting in the studio one of the things we needed to take into consideration was the health and safety concerns of the studio to ensure the safety of our coworkers, we took into consideration the various hazards and dangers we could face whilst working in this confined area.
Potential hazard(s):
- Stray wires and cables across the floor
- Lighting equipment can become very hot
- Equipment such as tripods could not be correctly locked
- Backdrop stands not setup correctly
- Backdrop could fall from its frame
- Flash from the lights could be harmful if looked at directly
- Subject could fall off the stool provided whilst acting/modelling
- If the camera should become damaged small parts could be scattered across floor
- Studio is an enclosed space so risk of fire is increased
All of the potential hazards listed above all have simple solutions that helped prevent any OH&S concern. To begin with whilst setting up the lighting and backdrop we ensured that all wires and equipment was kept out of the way of any area where any person would be walking. The backdrop was unravelled from its frame until the stands to support it were correctly setup and locked into place, the tripod that held the camera was securely locked into place and kept in a specified area whilst shooting and was not moved from that spot. To avoid any issues with the lighting equipment the subject was directed to not look directly at the light whilst we were utilising the flash and all members were kept clear of the lighting equipment during shooting to avoid injury in case it should fall and/or become hot, also whilst shooting the subject was seated on a stool with both feet placed firmly on the ground to avoid injury via falling. Since we were working in an enclosed space each member was instructed to move carefully when needed and to avoid accidental contact with another person to reduce risk of falling and/or unnecessary obstruction whilst shooting. All of the OH&S concerns we noticed during this shoot were all taken care of in order to avoid unnecessary injury during the session.
Subscribe to:
Posts (Atom)