For my Psychoanalytical film I decided that as part of it I would use exaggerated diegetic sounds within certain scenes to try and enhance the feeling that the visuals would be giving. In order to actually enhance the diegetic sound I would need to record the sounds I intended to enhance that are made by certain actions that would occur in the film e.g. a door opening, the sounds would then need to be enhanced or modified and added into the film. One method of obtaining these recorded sounds is to use a dictaphone, which can record sounds at close proximity. Once the sounds are recorded they can then be modified and enhanced then edited into the film at a later point to exaggerate the diegetic sound within the film. One problem with this however was that I had never used this piece of equipment before and it was rather awkward to use at first, even after reading the instructions on how to use it, the buttons were somewhat confusing and it took me a while to figure out how to begin recording sounds and playing them back, as I didn't realise that the record button needed to be pressed twice to actually record as pressing it just once only gives a preview of what the recording will sound like. I also had problems whilst recording as I was unaware that the volume on the dictaphone needed to be turned up quite high as it affected how loud the recording would be so that set me back trying to get the right volume as I had to constantly re-record sounds that were too quiet, as well as having trouble hearing the sounds unless the volume was turned up even while I was wearing headphones when using it.
Even with the initial problems with using the equipment, after a few attempts and practice with it I quickly learned how to use it properly and I managed to record the majority of the sounds I required for my film, I will be using these sounds as enhanced diegetic sounds within my production as an aid to the visuals of the film. The use of the Dictaphone was actually quite easy once I figured out how to record the sounds and navigate the digital menu system, also once I knew about how to adjust the recording volume it made acquiring the sounds much easier and by using headphones I could hear what the sounds being recorded much clearer. Another issue with the Dictaphone I found however, was that the SD memory card that was provided with it was somewhat "defective" as it didn't register as being an SD card when inserted into the Dictaphone so I couldn't record anything onto the card as it didn't register that the card had even been inserted into the device. The issue was resolved however as I needed to simply replace the SD card with my own from a digital camera which ended up solving the problem as it registered the SD card this time and created a separate sound folder in the cards memory so I was able to record the sounds I needed.
Showing posts with label Setup. Show all posts
Showing posts with label Setup. Show all posts
Monday, 14 January 2013
Wednesday, 3 October 2012
Lighting Setup
2nd October 2012
As part of our new wave project, one of the essential things that we had not yet put into practice was efficient lighting techniques, so we decided to set aside a day where we would practice the different lighting techniques that are used in new wave films. First of all was the initial setup of the lighting equipment and the backdrop, we needed to unfurl the backdrop, setup the umbrella light to use as our key light, setup the tripod and camera, the flash trigger and we needed to organise the positions of the camera and light source to coincide with the different lighting techniques. All of this preparation was vital to ensure that when we got down to actually filming these lighting techniques it worked effectively. The initial setup of the lighting equipment was a new kind of task for us as we hadn't used large lighting equipment before, so at first there were a few uncertainties on how to operate them, however as we were only using one key light, we quickly got accustomed to it. After all of the equipment was setup and ready to use we wanted to make a quick start on practicing the different techniques we might need for later shoots.


When setting up the lighting in the studio one of the things we needed to take into consideration was the health and safety concerns of the studio to ensure the safety of our coworkers, we took into consideration the various hazards and dangers we could face whilst working in this confined area.
Potential hazard(s):
All of the potential hazards listed above all have simple solutions that helped prevent any OH&S concern. To begin with whilst setting up the lighting and backdrop we ensured that all wires and equipment was kept out of the way of any area where any person would be walking. The backdrop was unravelled from its frame until the stands to support it were correctly setup and locked into place, the tripod that held the camera was securely locked into place and kept in a specified area whilst shooting and was not moved from that spot. To avoid any issues with the lighting equipment the subject was directed to not look directly at the light whilst we were utilising the flash and all members were kept clear of the lighting equipment during shooting to avoid injury in case it should fall and/or become hot, also whilst shooting the subject was seated on a stool with both feet placed firmly on the ground to avoid injury via falling. Since we were working in an enclosed space each member was instructed to move carefully when needed and to avoid accidental contact with another person to reduce risk of falling and/or unnecessary obstruction whilst shooting. All of the OH&S concerns we noticed during this shoot were all taken care of in order to avoid unnecessary injury during the session.


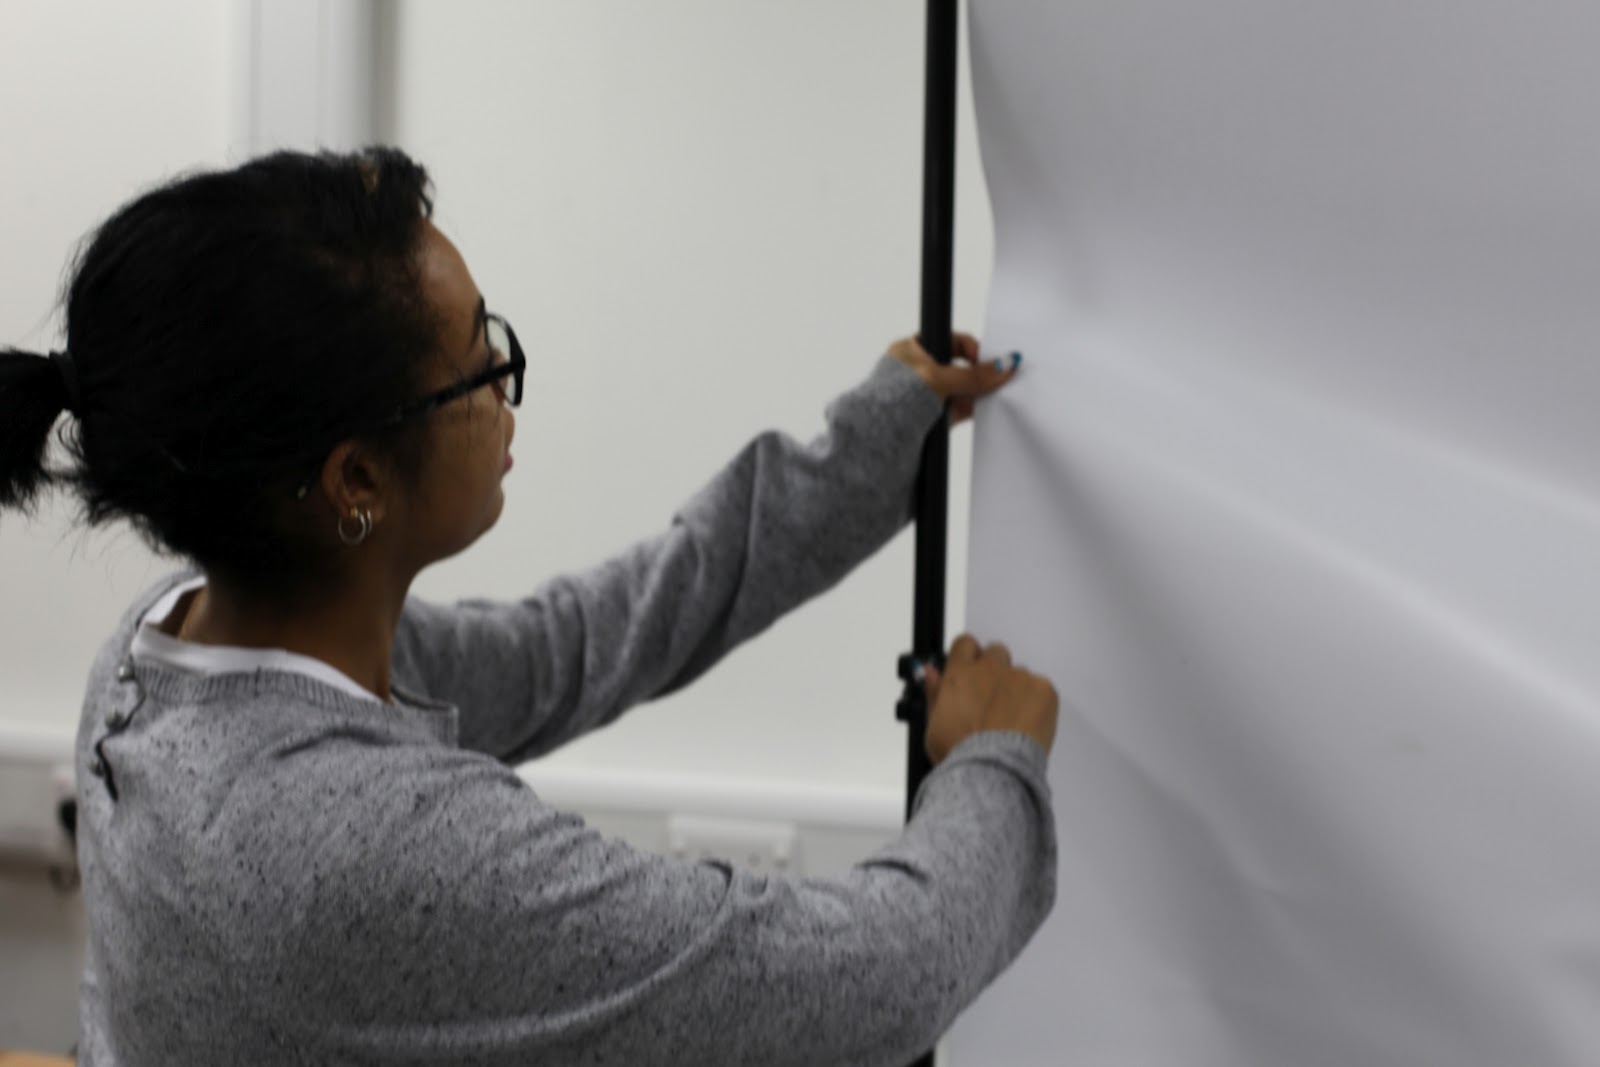


These images show our initial setup of the equipment and as we soon found out fixing a backdrop and operating a light all require more than one person simply due to the size of the equipment being used, as we did experience quite a few problems which we needed to correct before we could actually start shooting, so the setup of the equipment proved an interesting task overall.
OH&S: Occupational Health and Safety
When setting up the lighting in the studio one of the things we needed to take into consideration was the health and safety concerns of the studio to ensure the safety of our coworkers, we took into consideration the various hazards and dangers we could face whilst working in this confined area.
Potential hazard(s):
- Stray wires and cables across the floor
- Lighting equipment can become very hot
- Equipment such as tripods could not be correctly locked
- Backdrop stands not setup correctly
- Backdrop could fall from its frame
- Flash from the lights could be harmful if looked at directly
- Subject could fall off the stool provided whilst acting/modelling
- If the camera should become damaged small parts could be scattered across floor
- Studio is an enclosed space so risk of fire is increased
All of the potential hazards listed above all have simple solutions that helped prevent any OH&S concern. To begin with whilst setting up the lighting and backdrop we ensured that all wires and equipment was kept out of the way of any area where any person would be walking. The backdrop was unravelled from its frame until the stands to support it were correctly setup and locked into place, the tripod that held the camera was securely locked into place and kept in a specified area whilst shooting and was not moved from that spot. To avoid any issues with the lighting equipment the subject was directed to not look directly at the light whilst we were utilising the flash and all members were kept clear of the lighting equipment during shooting to avoid injury in case it should fall and/or become hot, also whilst shooting the subject was seated on a stool with both feet placed firmly on the ground to avoid injury via falling. Since we were working in an enclosed space each member was instructed to move carefully when needed and to avoid accidental contact with another person to reduce risk of falling and/or unnecessary obstruction whilst shooting. All of the OH&S concerns we noticed during this shoot were all taken care of in order to avoid unnecessary injury during the session.
Tuesday, 2 October 2012
Vimeo Account Setup

One of the essential things for this course that is needed is a way to display videos on a blog, I've found so far is that you can easily display film footage and tests that you carry out, to begin with this seemed a problem as I recently had no idea how to display videos on a blog before, so in order to display my filmed footage as an example of my work I needed to figure out how to upload video to my blog. Initially I thought that I could simply upload them directly onto my blog however due to some technical problems such as not having the correct plug-ins installed I couldn't do this. The second option was to try and setup a YouTube account and embed the videos from there, however due to heavy restrictions on what users are allowed to post on that site it seemed impractical, so the last choice was to use Vimeo, a preferred site for amateur filmmakers, and I will say that the setup of an account was easier and simpler than setting up a YouTube account as all it required was an email address and password, then I could start uploading and I could upload multiple clips at once which made it faster. The only problem I've found with Vimeo so far is the lengthy amount of time it takes to convert the uploaded videos so that it plays on the website but it converts them automatically so it doesn't seem that much of a problem as you don't even have to keep logged in to the site. I think that using the Vimeo site is going to be crucial in later work as I will need to upload vast amounts of footage to show different techniques not just to display what I've done but also as a quick reminder to myself.
Thursday, 13 September 2012
Mac Computer Setup
Upon joining this HNC course, one of the
first steps for us to take was the set up of our own mac computers, I’d never
done this before so I presumed it would be a somewhat difficult task,
considering I had never set up a computer on my own before let alone an Apple
Mac. However my expectations were misguided, as the task of setting up our Mac
was surprisingly quite simple.
After taking all of the hardware out of its
packaging it was a simple matter of plugging in the monitor, and then attaching
the keyboard and mouse to it. It actually turned out to be very simple and easy
to set up. The actual startup of the Mac also turned out to be quite
straightforward with easy to follow audible instructions. The only problems
that anyone encountered were the steps necessary to set up the Internet
connection, however once given a password to access the network the rest of the
setup followed quite easily. We continued on with the steps for the set up and
created our own accounts in order to allow us to begin our work.
Subscribe to:
Posts (Atom)